You can now set standing instructions on your SBI account for any account online on your phone from anywhere. This will allow you to automatically transfer money from your account to another account at certain intervals.
State Bank of India (SBI) has made it easier to set standing instructions from your mobile through the SBI Yono Lite app.
ADVERTISEMENT
In this article, you will get to know the following points on how to set Standing Instruction (SI) on the SBI Yono Lite app,
Let’s see each of these points in detail.
Details required to set Standing Instructions on the YONO Lite app
You will need to download the SBI Yono Lite app to set Standing Instructions through the app. You also need your Internet Banking details and your registered mobile number to log into the app.
In case you have forgotten your Internet Banking details, you can find your username and reset your password online.
Also, make sure the account to which you want to send money is added to your beneficiary list.
ADVERTISEMENT
Steps to set Standing Instructions on the YONO Lite app
To set Standing Instructions (SI) on the Yono Lite app,
Step 1: Open the ‘Yono Lite’ App
- Download the Yono Lite app from the Play Store or App Store.
- Log in to the app using your Internet Banking Username and Password or MPIN.
- The dashboard will open up.
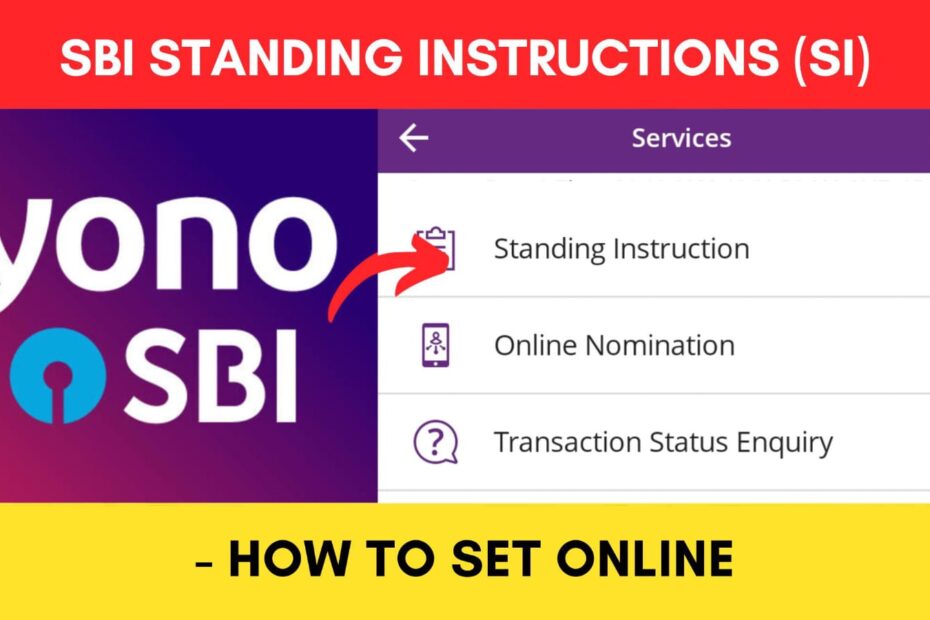
Step 2: Select the ‘Standing Instruction’ option

- Next, tap on the ‘Services’ option.
- A new page will open.
- Next, tap on the ‘Standing Instruction’ option.
- Next, tap on the ‘Create Standing Instruction’ option.
ADVERTISEMENT
Step 3: Select Beneficiary account
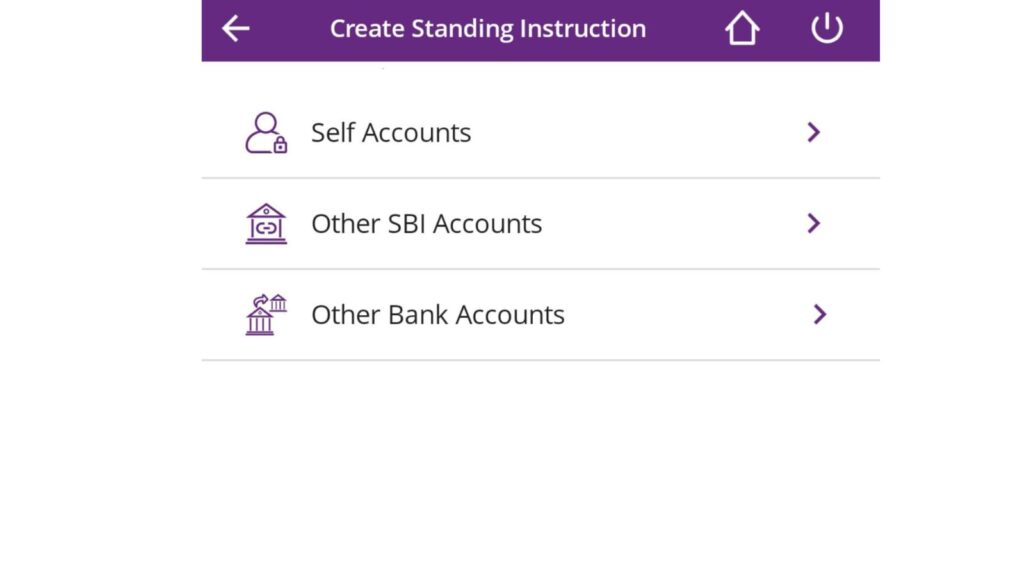
- Now, select which type of account you want to transfer the amount.
- Next, select the account from which you want to transfer the amount.
- Next, select your preferred mode of transfer (if provided).
- Next, choose the Beneficiary Account to which you want to transfer the amount.
- All the details will be displayed.
Step 4: Set Standing Instruction
- Next, enter the ‘Amount’ in the specified field.
- Next, select the ‘Purpose of Transaction’ from the drop-down list.
- Next, select the ‘Standing Instruction’ option.
- Next, select the ‘Frequency of Payment’ from the drop-down list.
- Next, select how often you want to transfer the amount in the ‘Schedule Payment every’ field.
- Next, enter the ‘Number of Payment’ you want in the specified field.
- Next, select the ‘Start Date’ by tapping the ‘Calendar’ icon.
ADVERTISEMENT
Step 5: Submit Standing Instruction
- Next, tick the ‘Terms and Conditions’ box.
- Next, tap on the ‘Submit’ button.
- All the details you have filled will be displayed.
- Next, tap on the ‘Confirm’ button.
- An OTP will be sent to your registered mobile number. Enter it in the specified field.
- Next, click on the ‘Submit’ button.
The Standing Instruction will be set successfully.
By following these steps, you can easily set standing instructions on your SBI account to any account online through the SBI Yono Lite app.
You can also set these standing instructions (SI) online through the SBI Net Banking portal.
Click to know the steps to set Standing Instructions using OnlineSBI.
More articles about Banking
- How To Know Your PNB Customer ID Online (In 4 Steps)

- How To Check KYC Status In SBI Online (Via Net Banking)

- How To Complete SBI eKYC Through Aadhaar Online (In 4 Steps)

- How To Download PNB Account Statement Online (Via Portal & App)

- How To Reset PNB Net Banking Password Online (In 6 Steps)

- How To Reset Axis Bank Net Banking Password Online (In 4 Steps)

(Disclaimer: The information provided in this article is for educational purposes only. The screenshots/logos used are the intellectual property of the respective owners. dreamtrixfinance.com neither endorses nor is affiliated with the brands/websites mentioned. This is not financial advice.)